Friday, April 15, 2011

It's Black and White ( No Really )


Image Title - In The Beginning


I have spent most of my photographic life using Film. To be more specific, slide film. When I returned from a photo shoot with two or more rolls of exposed film, I would pack them into the pre-paid envelopes and send them off to Kodak or Fuji to be developed. I would then have to wait about two weeks to get them back from the lab. With great excitement and expectation, I would place them on the light table to sort out the "keepers" good ones.

A roll of film was 36 exposures. To get one, yes ONE, keeper was good. That is a low number by today's standards, but with film you didn't have the luxury of checking your exposure or even the composition on the LCD screen on the back of your camera.

I had a lot of disappointments. I remember oh-so-well the excitement of viewing the slides. I also remember the oh-my-gosh and horror of a blown out image or a terrible composition - shots I thought were going to be big money earners. Of course, then I had to explain to my wife that once again it would be beans on toast for supper.

Over the years, I have really tried to get out of the habit of having to have at least one keeper from each shoot. But even now, I regard every photo shoot as a failure if I do not get that "keeper."

Which brings me to the point of this blog !!

When I get home from a shoot, I nearly always follow the same routine. After I download the images, I do a very quick run through and get rid of the really crappy bad ones (even now there are a lot of those). Then, I rate them based on quality and likeability (is that a word here). Five being the best, down to one, which is very nearly a delete.

After looking through the images a few times, I usually find one or two that are moderately acceptable or I think have some potential. Then I go through the mediocre ones and look for any images with a lot of contrast and with those images, I do a quick and dirty black and white conversion.


You will be surprised how a very mediocre image can really pop as a black and white.


This is just another case of a black and white saving the day.

Meaning, that we could have some meat with our beans for supper!


Image Title - A Fishermans World


In the images above, I used Photoshop for my Black and White Conversion. Recently, I have been using Adobe Lightroom, which like Photoshop, has a quick and dirty conversion you can use to quickly view the image as a black and white. Lightroom has another awesome tool, which gives you alot of control when converting the final image.

Below is a great example. In 2010, I went with my wife and son to Bonavista. I found myself at one of the most photographed lighthouses in Newfoundland. I had my camera, but it was around midday and the light was horrible. I took a couple of shots, but everything was wrong. The shots were over polarized (too blue) and had a little vignetting, which is normal with a wide angle lens. To top it off, the camera couldn't have been on the same plane as the scene. In other words, I was shooting slightly up or down a little, which makes the outside lines converge (the pole). Take a look.


Now see the same image with a Lightroom Black and White conversion.


If you want to get really Cocky creative, try adding a vignette. Not only are they FREE, a vignette could be the difference between beans on toast and steak dinner on the table for supper.


You may think that this technique is only for landscape photography but I can assure you it has saved the day for many portrait and wedding photographers also. Next time you are viewing someones web site and you see a few Black and White images have a real close look at the exposure of the shot.


As always, I'd love to hear from you. If you have any questions or just want a chat, feel free to get in touch with me.

Until next time - Have fun.

Thursday, March 31, 2011

Every Picture Tells A Story ( Literally )


I honestly believe there are no bad images - there are lots of images that I really like and lots that I dislike.

When a photographer takes an image, I believe they take it to the best of his or her ability. If they show it to the public, surely that means that they like it. But sometimes, we as viewers just don’t connect to it in the same way.

Anyone can take a picture, with any type camera. It can be a small point and shoot or the top of the line DSLR.

But, there are a few variables that do come into play:

(a) Being there at the right time is a huge factor in any image.

For me, that nearly always means being at my desired location, set-up and ready for the sunrise or the sunset - which for me, offers the very best light situations.

In fact, throughout the day (when the light is boring), I'm usualy out and about scouting for a potential shot to come back to later.

For Mum or Granny or even Aunt Fanny with their point and shoot, being there at the right time can make the photo. For example, at little Debbie’s third birthday party when her sister pushes her head in the cake or at the rink when young Joey gets his first ice hockey goal or just as the family dog Rex comes out the ocean and starts shaking himself and soaking poor old Aunt Fanny Uncle Fred.

(b) Having the right equipment - But only for you and your needs.

Like I already said, a small point and shoot is perhaps the only thing you will need. Especially for typical family shots. They produce great images for recording a second in time.

I have seen some terrific shots taken with the cameras that are built into phones and all mobile phones seem to have them these days. There are a lot of images taken this way, that you see on the social media. Images that only a few years ago, you would not have had a chance to see.

For the type of photography I enjoy, there are a few more pieces of equipment that I just cannot do without. For example: my tripod; a shutter release; a few filters; a couple of lenses and a cold beer a snack.

c) This next one is huge! "LUCK"
Of course this is not essential, and you're not in control of it anyway. If you have checked off all of the above, and this thing called "luck" happens, a nice image can turn into a great image!

Think of all those images that you see and think, "WOW. How did they do that?"

Yes, they were there at the right time. Yes, they did have the right equipment. And, yes, they did have the knowledge of how to take the image. But luck, which we all can have, played a big part in it too!

Oh boy! I can just imagine how some people are going to react to that! But, really? Would you have gotten that little smirk on the kids face or the look in Aunt Fannies eyes at that split second, without the help of "L" word? Really!?

(d) The story before the image.
I think this is relevant to all images. I know for sure, it is relevant to mine.

In this situation, it doesn't come into play until after the shot.


To demonstrate what I mean, I thought I'd tell you the story behind the image above. I sell numerous framed copies of this image in the gallery. But, most of the people who buy it don't not know the real story behind it. They just like the image. For me, the story behind it, makes it very special to me.

My daughter, Emma phoned and asked if I wanted to go out and do some photography. It was about lunchtime and quite a nice day, so I said OK. Emma had an idea to see if there were any icebergs around. This was during the last week in July, which is late for icebergs. But, we figured we'd take our chances. If there wasn't any icebergs, we'd find something else to photograph. Besides, this had been a strange season and I did hear of a few still being around.

We set off to Leading Tickles, which is just over an hour drive for us. As we were driving and chatting, the weather took a turn for the worse. It got very dark and overcast, totally blocking out the sun and threatening to rain. As we approached Leading Tickles, I could see a huge iceberg off in the distance. Knowing the area, I had a pretty good idea where it was. If I was right, the sun would set behind us and we would be shooting South East. If the clouds broke, there was a pretty good chance we'd get a red sky sunset.

Once we arrived and came around the corner on the west side, there stuck in the bay was a big iceberg. It was perhaps 50 feet from shore. From our position on the beach, we could frame it and have the government fishing wharf in the background. We both took a lot of images, but there was nothing startling about them. In our opinion. Being visible from the road, many people had stopped to take pictures of the iceberg.

When we headed back to the truck, I told Emma the bigger iceberg we saw coming in could be grounded at the other end of the park. It was getting late at this point and the sky was very dark and cloudy. In fact, it looked stormy and the end of the park was at least a 40 minute walk through a wooded path - partly boardwalk and alot of steep steps.

We decided to go for it. We parked the vehicle and headed down the path carrying our heavy photo backpacks and tri-pods. As we got towards the end of the boardwalk, we set off on the narrow trail and down a slippery hill towards Hubbards Beach. As we came out of the trees, right onto the shale beach we were rewarded with a huge iceberg grounded perhaps 200 feet away from us.

We were both in awe. It was truly majestic. The light however, was horrible. No sun and huge black clouds rolling over us. By now, it was around 8.30pm so we knew there was very little time left before it got dark. 

As we started to set-up, Emma yelled "Oh @#%&* I lost my tripod quick release somewhere on the trail."

A tripod usually has some sort of quick release mechanism to attach the camera and allow you to take the camera off quickly to move around. They range in size. On the tri-pod Emma was using, the quick release was a small silver threaded bolt. There was no way she was going to find it on the trail now. This meant that she would not be able to use her tripod.

I took a few shots, but could not stop thinking about how disappointed Emma must be in such a great location and no tripod. With it being dark, she would need increasingly slow shutter speeds.


At that moment, the sun shot through the clouds just like a set of headlights. As the sun lit up the very edge of the iceberg, we both gasped. All you could hear was "Wow. Holy S---" and both of our shutters firing constantly. Even the sky at the back turned a beautiful violet and red colour. It was by far the most amazing sight I had ever seen.

The light did not last long, but we both got a lot of images. The sun was at the back of us and at the very end cascaded across the very edge of the horizon. The sun went down very quickly and we were both left in the dark. We sat on the rocky beach for a while, talking about what had just happened. In disbelief about our "luck" we started to pack up for the long haul back to the vehicle.


After only a couple of minutes on the trail, lit only by the moon, Emma shouted “Well would you believe it" as she bent down and picked up the tripod release she had lost on the way in.

The walk back to the vehicle, did not seem as long as it was going in. Probably because we were laughing so much about what happened. I could tell by her voice though, that she was disappointed. She did not think she would have any decent images from having to hand hold the camera while using slow shutter speeds.

Now Emma is a very accomplished photographer and I knew that she would have worked out the best way to do the images in the situation she was in. And she had.

She had an image stabilised lens on her Canon 5D and she put up her ISO as much as she could and opened up her F stop just to get a faster shutter speed and the braced herself to steady the camera.

Okay she may not have an image that would have the resolution to print up to 36 x 24 but I am sure if she had anything it would print up to perhaps 16 x 20.

The image at the top is one of the ones I took and I called it `` Ice Berg Gold ``

The image below is one of Emma’s. Notice how she took it vertical to include the moon Smart Hey Lucky.


And she called hers "Iceberg N Moon"

This story I think demonstrates, how the time before and during the image is so important. Like I said, I sell a lot of this particular image to tourists but to me the power of the image is the way everything came together. Including the LUCK when the clouds broke and the sun lit the iceberg. Also, because I was out shooting with my daughter - which I don’t do very often.

I am sure you must have stories similar to this about your images. As always, share them. After all, they are an important part of what we do! Who knows, you may even talk me into telling you more.

Until next time - Have fun.

Monday, March 14, 2011

An Old Dog - "SORRY" - A More Mature Dog Can Learn New Tricks !


I was sitting in the lounge the other night, with my wife and my youngest son, Kris. We had just started to watch a movie, one that we had all been waiting to see for a while.

I looked over at Kris. He was doing something strange with the top of a bag of chips and it got my attention. My curiosity got the better of me, so I stopped the movie and asked what he was doing. He was folding the top of the chip bag onto the inside, just like you would roll up a shirt sleeve. “It stops the bag from rustling and annoying everyone while I eat my chips," he explained.

Wow!! Go figure. It really did work. I guarantee next time you are eating chips, you will try it.


I hope that with that image, I have your attention!
If not, I have a great movie you may borrow.


It got me thinking about all the little things I do in photography that I take for granted. Things that make photography work flow a lot simpler or easier. So, I thought I would pass a few along. I should just quantify this by saying, I did not think of any of these things myself. To clarify, these simple tips are things I have read about along the way or saw on a photography site.


My Canon 5D remote release


One of the items that I use 95% of the time while I am taking pictures, is a remote release – it just makes the job so much easier. When you are using a tripod, it is a must to stop any sort of camera vibration when you press the shutter manually.

Apart from that, you can look up away from the viewfinder and time your shot better - especially if you are waiting for a wave to break or a lull in the wind to stop blowing flowers or trees around.


Anyone who has ever used a cable release knows how the 3ft cord can be a pain. If gets tangled around the tripod legs, and it dangles around when you take the camera off the tripod. This is really annoying when you are walking around looking for a better composition.

The solution is simple and I honestly, could not do without it now.

Glue a small piece of Velcro onto the remote and sew another piece onto your camera strap. Simple right?


There you have it a rustle free bag of chips a tangle free remote.


This next tip is so simple, but oh-so useful. How many times have you been out with you camera and all of a sudden the heavens open up and it starts to rain? When it happens to me, I am often quite a long way from my vehicle or any sort of shelter.

In the past, I've done what I'm sure most of you have done - tucked the camera inside my jacket or put it into a camera bag. The only problem is that most camera bags are not completely waterproof. Plus, in the summertime I very often don’t have a jacket.


FREE - Hotel Shower Caps

What's the solution? Keep a couple of those free hotel shower caps in your bag or pocket. The elasticated band allows the shower cap to fit securely over the camera or lens a treat.

I also once read once about a photographer shooting through a shower cap to get a soft focus sort of effect. He must have been having an real uninteresting type of day.

But to be honest, the images were quite good.


Now, I own a small Hotel, so I will be counting them if you stay here and if
“Mr. Holiday Inn” calls, I will deny it was my idea.

Lastly, this is more of an aid to a technique tip. I do a lot of photography using a huge depth of field. In order to achieve this, I focus using the hyperfocal distance technique.

If you want to understand the science behind hyperfocal distance focusing, this website is a great start: http://www.johnhendry.com/

In a nut shell, if you focus ahead of the nearest element in your image that you want to be sharp by the right amount - which is determined by your focal length and the aperture you are using - you can produce one of those really nice images that you see where the boulder at the front of the image and the mountains on the horizon are all sharp and in focus.

To do this, I have a little chart which tells me where I need to focus using a particular focal length and aperture to achieve this look.

Once I have my shot composed, I look at the chart and see at 24mm and f8, if you focus at 8.44ft your image will be sharp from 4.22 feet to infinity.


You can make one of these charts by visiting the website listed above. Its the same site to read about hyperfocal distance focusing. You just enter your lens details and the information is provided for you. My chart is printed on a 3 x 4 inch card and is laminated. This chart is always in my shirt pocket when I'm out shooting.

I hope you find these tips useful. If you have any of your own, please share them in the comments section. 

Turns out, you can always teach "someone" new tricks.

Until next time - Have fun.

Sunday, February 20, 2011

The Picture Within The Picture

It seems, I must have had something relevant to say after all. I was very pleased to see that people did look at my first blog post. They even asked when the second one was coming - unless it was just out of sympathy. Anyway, here goes BLOG number 2.

This past week-end, while at our cottage, I was reminded of something I learned a long time ago. So, I thought I would pass it on.

It was a bit bleak on Saturday. Not very cold, about -3 degrees. It was stormy, but not snowing. I was determined to go out and take a few shots. So, I took my trusty Canon 5D and 16-35mm lens - thinking I could do some scenic shots with a long depth of field. I planned to use slow shutter speeds, so I mounted the camera on my tripod. The snow was very deep - way over my knees - with a sheet of ice on top. As I broke through, the ice would scrape up my leg. It was actually quite painful. Anyway, I walked and walked, looking for something interesting to photograph. Unfortunately, there was nothing. As I got to the end of our land (the point), I sat on a rock and just looked out at the ocean. The shoreline was frozen and like I said, it was a very dreary "boring light" kinda day. I decided to take a couple of shots. My plan was to start out very low to the ground. With my lens at 20mm, I used hyper focal distance focusing to get a near to far sharp image. Honestly, the shots were boring, so I started to walk back to the cottage for a hot cup of coffee.

These next two images were taken on that day.


The one above was taken from the end of my piece of land and the one below taken from my wharf.


I think you will agree that because of the very flat light they are both very uninteresting.


About halfway back on the trail, I stopped and was looking at the snow hanging on the pines. I started to notice all sorts of things...icicles hanging from a pine tree, the broken branch of a tree, where the bark was a completely different colour against the white background, a few tips of pine needles poking through the snow and even a squirrel sat looking at me, while still nibbling away at his nuts at his stash.

At that moment, I remembered something I had learned a long time ago...

When you're out walking around - looking for images - every so often, you need to stop and put your camera up to your eye. This allows you to actually see, the "Image Within The Image". Our eyes can see close to 180 degrees with our peripheral vision. A big picture, that sometimes overshadows what we very often take for granted. I guarantee, if you look through the lens, you will see things you did not see before. By looking through the camera, you are focusing your attention on a smaller area. You are seeing what your lens will see. You can make this even more interesting, by getting very low to the ground or very near to an object. Try it ! You will be inspired ... I promise.


Now these next two images were taken only a matter of a few feet of the first images.


There is also another way to "see the image within the image" and believe me this works. When you're ready to take your shot - you have your scene or subject composed and ready to shoot - cup your hands around your eyepiece, blocking out all your peripheral vision and any extraneous light. By doing that, you are seeing exactly what your lens is seeing. Your composition will be way more exact - I promise.

Ever wonder why the pioneers of photography in the old days, had a black sheet pulled over their head to compose and take the shot? By the way, this concept is still used today with big view cameras. For those of you thinking, its to stop the stray light from entering the viewfinder on the camera, you're right! But, it's also a great composition tool. Just like cupping the eyepiece on your modern-day camera, it focuses your attention to what the lens is seeing.

The next two images, are a perfect example. The first image is of an old fishing stage in Salvage.
I have sold a large number of framed prints of this image. But, look very closely at the second fishing stage in the distance.


This next image is even more popular as a framed print in the gallery. I walked down the shoreline and looked at the second fishing stage.
The bright blue gloves immediately caught my attention.


The Picture Within The Picture.

Next time you find yourself searching for shots, try this tip ! If it works When it works for you, send me a comment or even a peek at some of your shots.

Until next time - Have fun.

Friday, February 18, 2011

History


Well here I go, head first again. “Flying by the seat of my pants”, as my wife would say. I have been thinking of writing a blog for a while now, but I really did not know if I had anything relevant to say. As a result, it always stayed on the back burner and never got started.

I guess this is it - and now is the time - I honestly do not know what direction this whole thing will take. It may be a photographic journal. It may be a teaching aid for some or just be a few stories from my photographic journeys over the years. The one thing I do know, is that it will be photography based. After all, it seems from a very early age, photography has been a part of my life. I don’t think I am as passionate about photography as some people, but in one form or another it has always been there in the background. I am hoping that as this blog gets going, it will take on a life and direction of its own.

When I was 16-years-old, I had just left school and started my first job - working for the Commodore Banqueting Rooms in Nottingham England. My job included helping with outside catering events or indoor catering events such as dances, weddings and parties etc. During some of the evening or week-end events, I would be there when the event photographers would arrive. I believe that might have been the first time I took an interest in buying a camera. I got to know the photographers quite well. It was Jock Thorburn and Dennis Philips or Pip as most people knew him. Their company was called Thorburn and Philips. Little did I know, our paths would cross many times in the future.

On a weekend, I would very often go downtown Nottingham to Jessop’s, a store with a photographic equipment display in one of the main windows. I would drool over the cameras. Of course, at 16-years-old, I could not afford to buy one and I was under age for financing. That is where my father came into the picture. I pestered the poor man, until he eventually agreed to sign the finance agreement to purchase the camera with the understanding I pay him back.

I was now the very proud owner of a Praktica Super TL. The hair on the back of my neck just stood up. Just as it did back then with the anticipation of my first images.

I used that camera for many years. Shooting mainly snap shots whilst on vacation and a lot of action photographs of my brother in his ice skating pursuits.

---------------------------------------------------------------------------------------------------------

These first two images were taken in 1972 with my Praktica Super TL on slide film, which was most probably Fuji Velvia.

  ---------------------------------------------------------------------------------------------------------


In 1972, I changed careers and joined forces with my father, a Dental Technician.  We rented a space on Arkwright Street in downtown Nottingham and opened our own business. I was thrilled to discover, the third floor of the building was rented to Thorburn and Philips Photographers. I would spend hours watching Pip develop and print all his commercial photographs. He would answer all my very basic and sometimes stupid questions. You know, there was something really cool about being in the darkroom with just the very dim orange safe lights on.

I remember him taking the films out of his cameras and lowering them straight down into huge, refurbished submarine battery tanks full of chemicals. Once developed, he would hang the strips of film to dry on a string of wires attached to the ceiling. While he was hanging the film, I would go down the row with my head tilted sideways looking at all the different shots.

Sometime in the early 1980’s, I changed from my trusty old Practika to Canon cameras and lenses. I now had a new hobby and it required a different sort of photography. Although I was still only an amateur, photography was exciting and I was looking for ways to develop my skills. My new hobby was Herpetology, which is the study of reptiles and amphibians. I found myself on many field trips, often out in the wilderness and at local zoos. I was usually in or behind the exhibits, taking lots of images of reptiles and things.

By now, I was using very slow slide film and close-up lenses, ring flashes and nearly always a tripod. In fact, even today when I go out shooting, I feel lost without my tripod.

--------------------------------------------------------------------------------------

The following reptile images were taken in the early 1980s with my Canon T90 camera. My preferred choice of film at that time, was Kodachrome 64 slide.

--------------------------------------------------------------------------------------


-------------------------------------------------------------------------------------

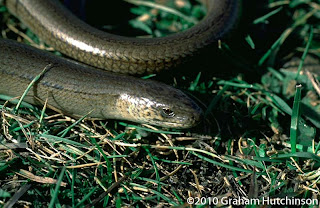
(Top Image): A young Adder, which is the only venimous snake in the UK. (Left Image:) A Slow Worm. While it looks like a snake, is actually a legless lizard. Its limbs having disappeared in its evolution.

--------------------------------------------------------------------------------------


I really enjoyed those times. I had lots of great experiences - sometimes very scary ones - when we photographed poisonous snakes or nasty monitors. We even photographed crocodiles once - I still have the well earned scars to show for it.

In 1990, my wife and I emigrated to Newfoundland Canada with our three children. We started a small Hotel business and although I don’t take as many pictures now as I did in the UK, photography is still something that is always on my mind. I converted to digital photography in 1993. While reluctant, I could see it was the way of the future. Now I can't imagine doing any other sort of photography. What at first seemed like more of a point and shoot type of photography, has become by far the most challenging and rewarding type of photography I have ever done.

The next two images were taken in the early 1990's with a Canon 10D - My first Digital SLR.


My latest photography passion is lighting techniques. As always, I have thrown myself into it and I'm really enjoying it. I honestly think, I am bordering on being a “Gear Head”. I always seem to be buying some new piece of photographic equipment. I hope to be able to post some interesting lighting techniques here soon.

Well I guess that wasn’t so bad was it? If you're still reading and still awake, you now know how I got to where I am now. You know, not much has changed really. Yes, I am using different equipment, but one thing has stayed the same. When I take an image and look at that captured moment on the screen, its still the same WOW feeling that I saw when the slides came back from Kodak and I looked at them for the first time on the light box. If that is how you feel when you see your images, then you know exactly what I'm talking about. Right?

So...if this blog does grow, hopefully I can talk about how we can get the very best out of that feeling together.

Ourblogtemplates.com

Back to TOP